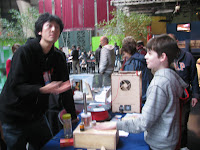
(This project was written up by community mentor Jim Stewart. Jim has extensive background in 3D imaging, but came up with a simple way of demonstrating it to our club. Below is Part One of his project: Taking the Pictures)
There are several ways to take and view 3D images. The simplest way is to shoot 2 separate pictures of the same subject, with one picture showing what your right eye would normally see and the other picture showing what your left eye would see. The two pictures are then positioned next to each other and saved as a single image called a stereopair.
We will be building a simple camera setup to shoot the left and right images and then we will use the free software image manipulator program called
Irfanview* to size the images and make the stereopair.
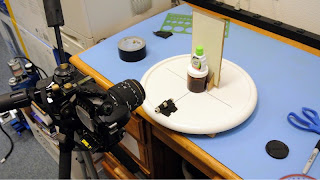
The first thing we need is a platform that can rotate. A Lazy Susan is perfect and can be purchased cheaply at most hardware stores. You might have to mount it on a piece of wood for stability.
Once you have the Lazy Susan mounted, rotate it and find and mark its center point.
Next, draw a line through the center point from one side to the other. Then draw another line through the center at a right angle to the first.
Now mount a laser pointer near the rim of the lazy susan with the beam pointed in line with one of the lines you drew. My lazy susan had a small ridge along the outside and I had to make a little platform out of cardboard for the laser pointer. Draw a circle centered on the center of the lazy suzan and find a small, round container that will serve as a platform for your subject.
Although it isn’t needed for making stereopairs, I made a little background for the setup. A textured or patterned background gives a better sense of depth to the images.
Now we are ready to set up the camera. You will need a camera that can take close-up pictures. Many cameras have a macro mode that lets you shoot much closer than normal. Before setting up your camera, make sure it can take a focused, tight picture of the area on top of your platform.
Once you’ve found an acceptable camera, mount it vertically on a tripod, centered pointing at your platform. On a small piece of paper, draw three vertical parallel lines, 1-1/8” apart. Tape the piece of paper to the bottom of the camera. Position the paper horizontally so that the center line is centered with the camera lens and vertically so that the laser pointer can shine on the paper.
Now we are ready to take the two pictures that make up the stereopair. Place an object on the platform, check the camera and turn on the laser pointer. Rotate the lazy susan until the beam falls on the left line and then take a picture. This will be right picture of the stereopair. Without disturbing anything, turn on the laser pointer again and rotate the lazy susan until the beam falls on the right line. Take the picture. This is the left picture.
Now we have to resize our left and right images and create a single stereopair from them. Run Irfanview and open the left image. We need to resize it to be 2.5” wide on the screen. Go to the Image > Resize/ Resample menu, check the Preserve Aspect Ratio box and enter a number in the Set New Size Width box. The number 225 worked for me, you may have to play around until you find your magic number that produces a 2.5” wide image. When you have successfully resized the image, save it and resize the right image using the same number.
Finally, we will use Irfanview’s Create Panorama Image feature to make the stereopair. Click Image > Create Panorama Image. Click Add Images, select the left resized image you saved. Click Add Images again and select the right resized image. Click Create Image. You should see your stereopair on the screen. By letting your eye muscles relax and reform the image, you may be able to see it in 3D without a viewer.
If you can, three images will pop into place, with the center one in 3D. If you can’t do it, don’t worry. In part 2 we will be making a viewer to easily see the 3D image.
*If you use a Mac, any basic photo/image editor should work in place of Irfanview.


